For those new to offshore or just new to our comp, I’ve put together a quick run-though of some of the gear you might want to pack for the trip. It is one of those ‘What is the best soft plastic?’ type of questions, as everyone will have their own ideas on equipment and gear, but here’s a quick run through on what’s legally required and some of the gear I tend to use as well as links to where to find them. It might help you narrow your search a bit. At first glance it may seem like a lot, but not all of the gear will be relevant to each kayaker and the margin of safety needs to be higher offshore as the distances covered are usually much longer and you have the added variable of ocean swells to contend with.
Safety Equipment
First off let’s cover the mandatory safety equipment to meet legal requirements, even if you plan on fishing coastal inshore it is best to be geared up for full offshore as the equipment is smart to have on board anyway and you may find yourself beyond the 2nm line if you are following the fish!
- PFD (must be worn)
- Bilge Pump
- Bailer (sponge)
- Waterproof torch
- Spare paddle
- Flare kit (2 orange smoke flares and 2 red distress flares)
- Compass (non-electronic)
- Registered EPIRB (not PLB)
The following items are not required legally but are highly recommended. Note that a safety flag is a requirement of the comp though, due to feedback we received from boaties in the area last year.
- Hi-vis safety flag (So boats/other yakkers can see you in swell)
- Phone in waterproof case
- Safety knife
- GPS/sounder with maps
- VHF marine radio
- PLB (In case you get separated from your ski)
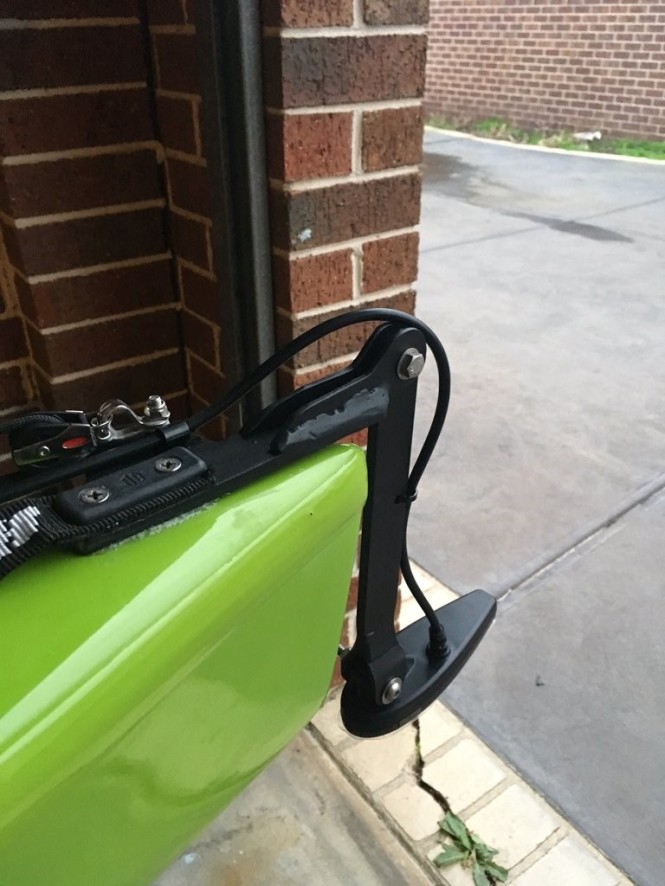
- Tow rope (15m long tow & short contact tow)
- Paddle float/stirrup for rough water re-entries
- Kwells/seasickness tablets if required
- Sunscreen
Fishing Gear
Everyone will have their preferred brands when it comes to gear, again I’ll outline what I use and then you can chase up gear in the weights and capacities outlined in your own brand of choice. With offshore kayak fishing, we can generally run much lighter gear than the boaties use because of the style of fishing. On a boat when fighting a fish a lot of pressure is put on the system – line, knots, rod, drag etc, whereas on a kayak there is a limit to how much pressure we can actually put on a fish before we start getting towed. For this reason, we can run much lighter line classes and there is no need for big-drag reels as you will never be able to use that drag on a kayak in practice. The gear I use is intended for the school fish that I am chasing, you’ll be under-gunned on a barrel tuna, bu then you wouldn’t fit one in the fish hatch anyway!
Trolling

I also tend to look at my offshore trolling gear as being somewhat disposable, I don’t have to cast with it and if it gets pulled from a rod holder or dunked I don’t want to lose hundreds of dollars’ worth of reels. For this job I tend to favour ‘clunker’ reels that don’t have the refinement of your top end Shimanos and Daiwas but are robust and can take some abuse. I usually carry two Penn stiff tipped glass rods in the 10-15kg weight range paired with Slammers in the 560 class spooled with 30lb braid. They have plenty of usable drag and enough line capacity for school fish at Portland. I’m not casting with them all day so the weight isn’t an issue, they are very easy to strip down and maintain and if a combo should happen to go swimming I’m not out of pocket for very much. A mate of mine that uses the same gear once said “Tell me a reel from Shimano or Daiwa that you can buy for $70 (on Dinga) that you would confidently take offshore to land a tuna on?” You could also go slightly more upmarket and use Uglysticks paired with Spinfisher V’s to give even more water protection and have less frequent strip-downs. In terms of rod length, for trolling I still like a bit of length as it helps to avoid tangled lines out the back, when you have to do darting turns to chase after a bust-up or diving birds. For this reason I don’t run two short trolling rods, usually either two longs (6’6″ – 7′) or a long and a short. If I’m running a long and a short the long rod will be weighted or have a deep diving lure while the short will go straight out the back. Again this helps avoid tangles by letting the lines pass over each other when turning.
Casting

My casting set-up generally will have a nicer reel and it is usually the only setup I leash on the yak; (I prefer less things to potentially get tangled in). Again, I like a rod with decent length to get better casting distance, personally I don’t see the point of the range of really short ‘kayak rods’ that manufacturers seem to be churning out – they don’t cast very far and you can’t pass your line around the nose of the yak to follow a fish. I like a rod around 7ft usually in the 8-15kg class. This can be matched with a ~5000 size reel with nice smooth drag and decent line capacity for 30lb braid. There are plenty of options in this category of reel depending on how much you want to spend; Stradics, Saragosas, Saltists, Slammer III’s or Conflict, Sorocco SW and Lethal on the cheaper end. It might also be worth having a read of some Alan Hawk reviews to get up to speed with the pros and cons of each offering. Offshore gear will tend to cop plenty of water so serviceability will also be important. Alan Hawk reviews mention difficulty in getting replacement fluids for mag seal units so for my next purchase I’m leaning towards the Sorocco SW.
At the moment I’m running a Gen Black Nugget, I’ll most likely pair it with a Sorocco SW in 6000 size to edge out my original plan of a Conflict. I plan on dabbling in some jigging too, so when a Gomuku Kaiten comes my way, I figure it could be paired with the same reel as a nice jigging combo. I’ll do a review on the combo once its had a bit of use.

Electronics
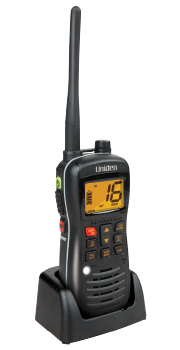
VHF Radios
I’ve owned a couple of radios and found some more robust than others. When you go shopping you can pay a little more for a DSC enabled unit, but as an added safety feature it will communicate your GPS coordinates to all DSC vessels in the area in the event of an emergency.
 The Icom M series radios are generally considered to be one of the best units around, they are very popular with the offshore yakkers up north. Personally I love my Uniden MH, it hasn’t missed a beat. You can also buy a waterproof sleeve for your radio too which will help protect it in the surf.
Emergency Position Indication Radio Beacons (Epirbs)
EPIRBS are one of those items that are expensive as an initial purchase for something that you hopefully never have to use, but when the cost is broken down over their usable life it becomes a more attractive proposition. The average beacon has a 10 year battery life and if they cost $250-$350 to buy really you are looking at $25 a year. I got my first EPIRB a few years back it was a GME MT600 unit, from memory it set me back around $250. I’ve never had to use it in anger so I can’t comment on its reliability, but I will say that newer units can be purchased with GPS in-built which dramatically improves location accuracy and therefore the search radius should you need to deploy it.
This unit is now available as a MT600G GPs version for $330, but when the battery goes on the current model, I will most likely opt for the more compact offering from Kti, the SA1G. It is a little cheaper at $290 and locally made so it will make life easier if there are any warranty issues.
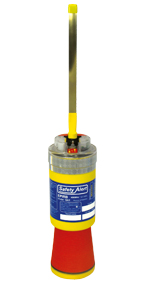
Speaking of Kti, they also make compact Personal Locator Beacons (PLB’s). These are easy to fit in the pocket of most lifejackets and while they don’t meet the legal requirements for full offshore fishing, they are a good piece of kit to have on any type of water. The main advantage of a PLB is that if you are separated from your kayak, your PLB will still be with you, in the pocket of your PFD whereas your EPIRB will be floating away from you on your kayak. The trade off is that unlike an EPRIB, which floats and transmits once activated without further input from the user, a PLB must have its antenna facing upwards and be held afloat by the user.

The Lure Box
Depending on what is on the chew in January you’ll need to decide on a means of targeting the comp species. With the bread and butter species, like in the bay you can opt for soft plastics or baits. If you want advice on plastics and jig heads you can go straight to the source and have a chat with a couple of our comp sponsors. Allan over at Munroe’s Soft Plastics is always happy to provide advice on plastic choices and John over at Jigman can sort you out with terminal tackle that should see you right to get some points on the board on the day. Both are top blokes, happy to talk fishing and it is always good to give back to the local companies that support us.
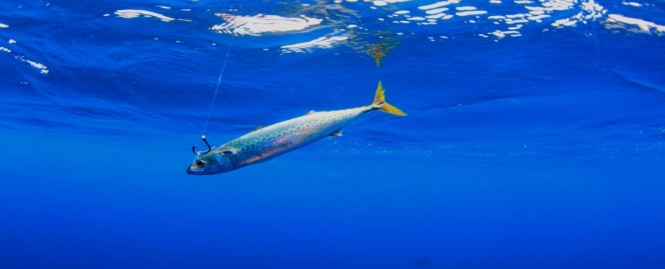
If you decide to go all-out for glory and tackle the pelagics, you have a few options to consider. For the kings, you can opt to go with livebait, dead bait, lures or soft plastics. In terms of bait, squid is the go, preferably as a livie but as a fresh deadbait it is also a good option. If the kings are really on they can even take californian squid too. In terms of lures and plastics you are looking at sinking stickbaits and big 10 inch soft plastics with white being the colour of choice for most anglers.

For the tuna, if you are in a quick boat a small skirt might be an option, Kieran managed to nab a tuna the day before the comp last year using this method. Hard bodies seem to be a better option in the winter tuna season out behind Lawrence Rocks rather than summer on North Shore. From last year’s reports plastics are a better bet here, look for 7″ jerk shads with pilchard/blue flecks. There is always the livebait option too if you can find some slimies! As the comp draws closer I’m sure the boys at Portland Bait & Tackle will be able to give you the low-down on what is working out on the reefs.
Clothing
During warmer weather, the more you can cover up, the less sunscreen you have to apply! You should also consider moisture-wicking and drying-times when kayak fishing and as a result do not use any cotton clothing or rash vests as they dry slowly and are cold when wet. Wet suits are great in the water, but out of it they act like a Coolgardie fridge with the wind carrying away your body heat in much the same way as an evaporative cooler does in your home.
Head wear:
There are a couple of options for head wear during summer. You can either go with a hat & buff combo or an all in one flap hat. Buff offer a wide range of face scarves that fit the bill, and an official Buff® buff can be purchased from Technical Headwear. If you go down the road of an all in one unit, you can get the Adapta-cap from Sun Protection Clothing Australia.

Upper Body:
Up top long sleeves help cover the skin to protect from the elements. This can be in the form of a light thermal such as the 2P Thermo from Adrenalin or a lightweight UPF50 polo. Again it is a case of avoiding the cotton t-shirts and lycra materials! If a nice lightweight polo is what you are after, for this year’s comp we’ve teamed up with Sun Protection Clothing Australia to produce a UPF 50 branded fishing shirt with all of the sponsor logos from #NSC18 with a sleek Southern Bluefin Tuna on the back. Profits go to Portland Surf Lifesaving, so you’ll be helping to save your skin as well as beach goers down the coast! You can add one to your entry at checkout when you register for the comp or click here if you want to add one later. On colder days you can layer up with a spray top or cag jacket from Lovig’s or Kokotat.
Lower Body:
On sit-on-top kayaks and skis we don’t have the luxury of leg protection from the deck of our boats so again coverage is key. A pair of lightweight UPF paddling pants or cargo pants can do the trick on warmer days such as those available from SPCA or if there is a breeze about a pair of light thermal pants can do the job nicely again the Adrenalin 2P thermos fit the bill.

Due to sharps on the beach as well as landing on slippery rocks and reefs, some protection for your feet is very important and often overlooked. So pop a pair of old runners on or pick up a pair of dive boots and you are ready to go!

If you are having trouble finding some of the gear or need to borrow a spare, feel free to add a post on the NSC Facebook page. You can also hit up some of the other guys for advice on the page or try to glean some more useful info after the briefing.
Tight lines!
Sea Sherpa