In what seemed like no time at all, NSC weekend rolled around again and the scramble began to pull everything together in time. After a tough Christmas fire season for the whole country knock-on effects were still being felt in terms of delivery services and it was looking like it would go down to the wire to have everything arrive on time. The last batch of NSC shirts arrived at midday on Friday allowing us to finish the welcome packs and pack the car to be on the road to Portland for briefing Friday evening. Last year’s sweltering heat was a thing of the past and conditions were looking reasonable for the weekend, we just had to hope the fish played ball. With 40 guys registered for the comp (8 for the first time) and a team making the trip over from South Australia we were set for a big weekend. With work commitments the way they are these days, I was looking forward to catching up with a bunch of blokes I don’t see on the water as often as I used to.
Day 1 – (Fishing 6.30am – 2pm)
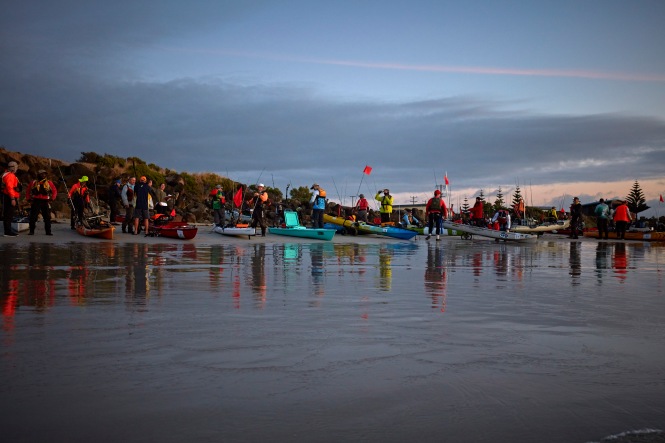
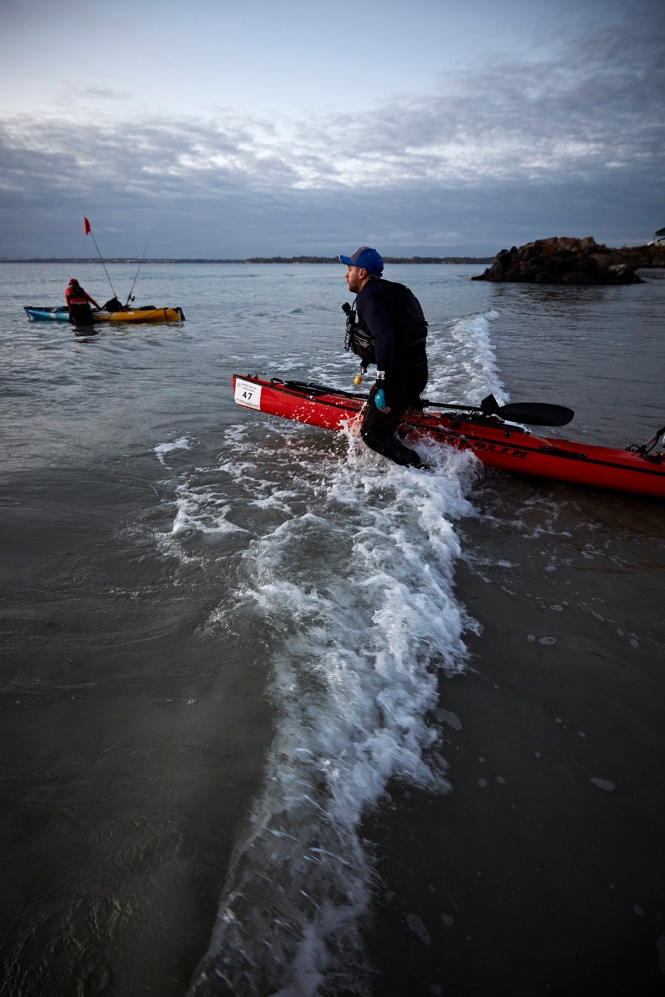
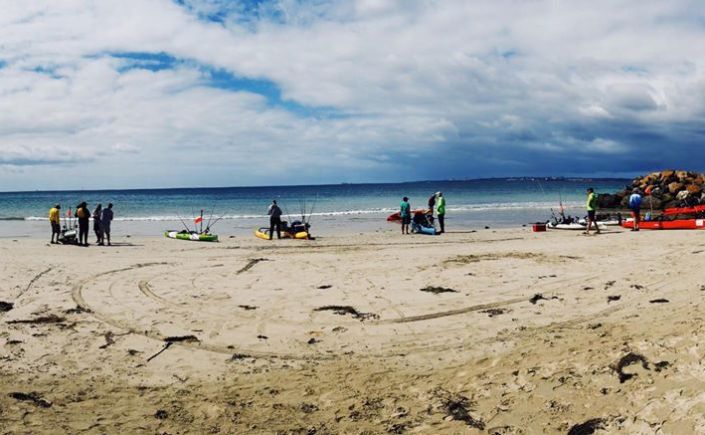
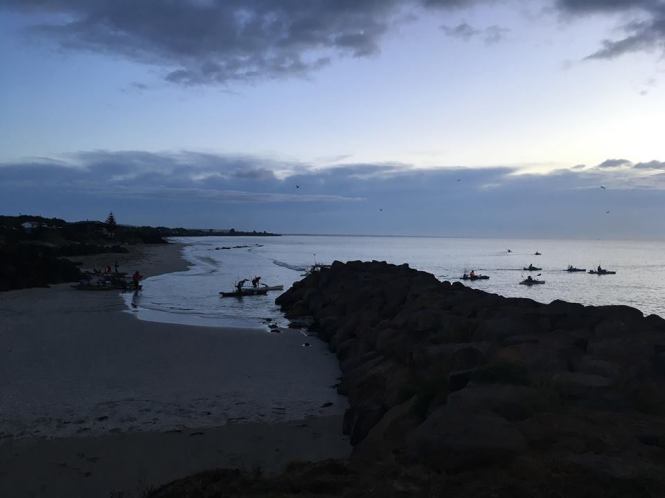
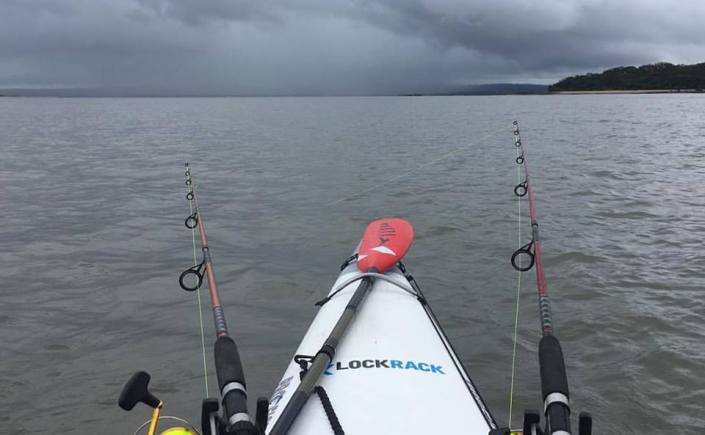
The morning launch saw mint conditions with light offshore winds and swell wasn’t an issue. The safety crews hit the water and the girls hit the beach armed with clipboards to check off all the safety gear. The launch saw the field spread out quickly with a variety of tactics being tried with some opting to risk it out wider facing the threat of a long run home into the strengthening wind. We had three late launches (Shane making the trip back from interstate and a local Portland team that entered on the day) but by the time an hour had passed we had all vessels out on the water.
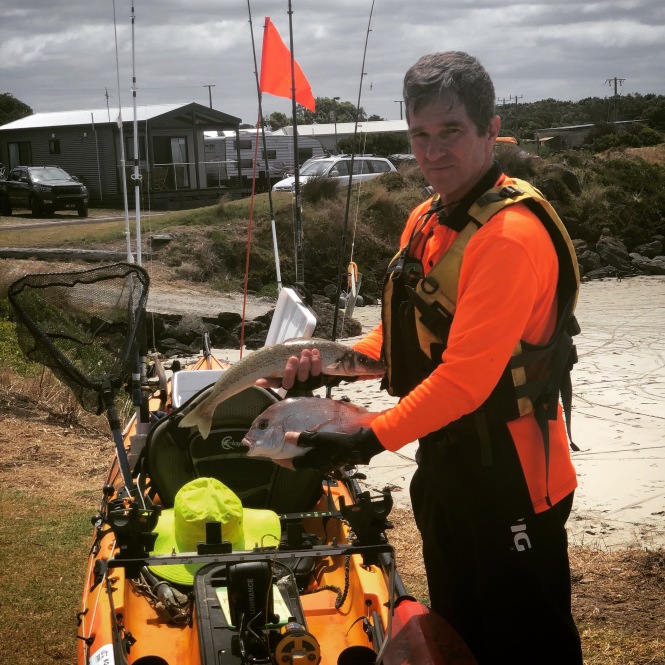
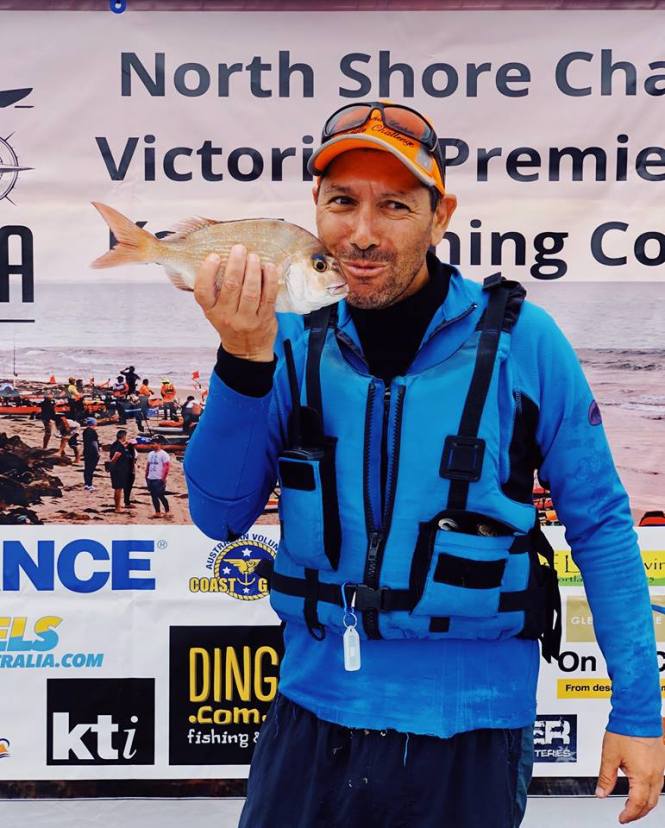
It was evident early that there were pinkies around with a number of anglers getting some early, the best of which went to Rob with a 48cm model.
There were whiting about too, and with Spider telling me stories of monster Portland whiting after NSC17, I had added them to the species list but had yet to see one of these unicorns entered in. That changed on Day 1 with Ben entering a solid 40cm model while Mal went one better with a 45cm model. Worth noting here that comp fish are measured in fork length so the ‘ting the boys entered were closer to 50cm overall than 40 and solid catches for the species.
Peatop managed to find the slimies for livebait, but unfortunately only bronzies took a liking to them with two good sized sharks back to back towing him out behind the anchorage before the end of the session. After battling two sharks to the surface, an offer of a nudge a little closer to shore from the Coast Guard was gratefully accepted.
We had a few salmon hit the measuring table too the best of which was Mav’s 44cm model, but at the end of session one the talk moved to kings…
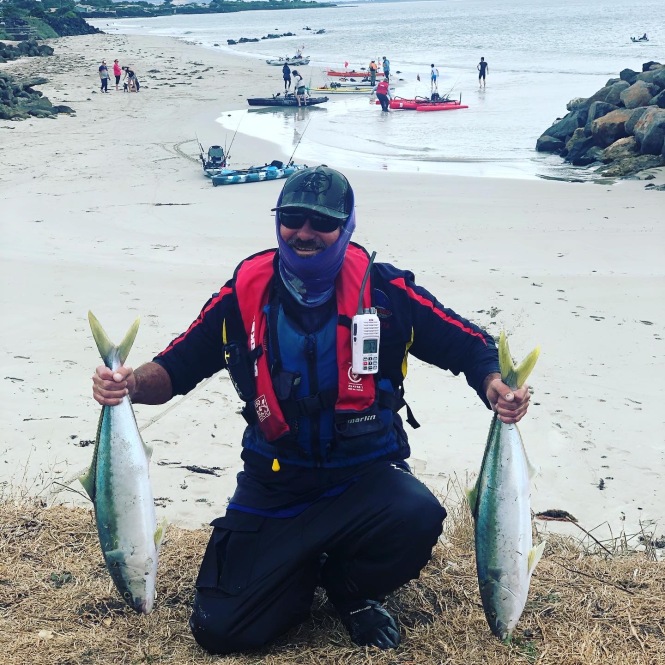
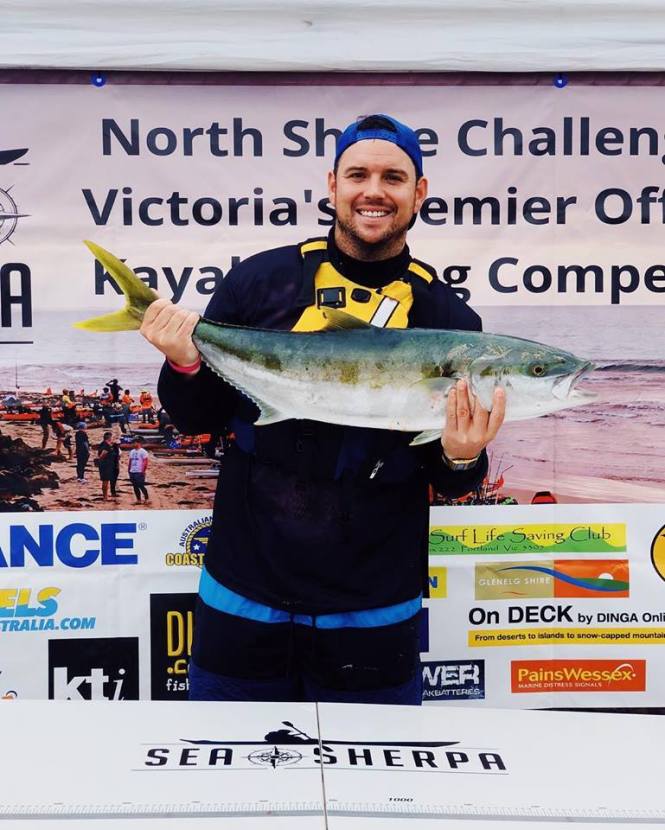
Ben was the first to throw his hat in the ring for the best catch comp with a rat king on the board, previous comp winner Lennon then added to his tally going slightly better with a 67cm (fork length) version but bragging rights for the day went to Tas with not one but both fish landed from a double hookup, the second on very light gear. As the session drew to a close Tas had a healthy lead in the individual comp but less than 20 points separated the teams. Tales of bust offs by kings abounded over pizza for lunch and right on cue there was a bust up out off the bluff allowing Ian to test his casting distance land based to no avail.
Day 2 (Fishing 6.30am – 11am)
Launch on day two saw calm conditions the wind had dropped during the night but was due to steadily increase throughout the morning. Day 2 saw the smaller fishing zone in operation but based on the previous few days fishing, you didn’t have to travel far to find the kings.
The launch on Day 2 also saw the beginning of the Day 2 Dash with a pair of Mako polarised sunnies up for grabs for the first person to nab a legal whiting. The dash was won by Cheater with one of his trusty prawns nabbing the required King George.
There were still some smaller snapper around on day two that were happy to be hooked as well as a few more salmon, coming in giving most teams points on the board. The wind was making things a little bumpy out wide. As the 11am cut off drew nearer the field began the slog back to the beach. This year’s tale of woe came from the Donkey Hunter team with Ian having a relaxing pedal back, pulling in on the beach beside a parked Stealth just before eleven only to find out that his beach didn’t have an admin tent or even a caravan park and wasn’t the same as our beach. He then had to round the point and make the slog back to Henty into the wind.
The big question that remained however was whether or not anyone would come to the weigh in with kings. That question was answered soon after when Aussie Dave hit the beach with not one, but two of his own. Gear was packed up and the group moved to the BBQ area to see if Dave had done enough to topple Tas at the top of the leader board…
Winner: Stephen Kent (Mako Polarised Sunnies, Drystore Drybag, Lowrance Buff)
Masters (Entrants born in 1970 or earlier):
Winner: Tas Russos 205.5pts (Soft Plastic and jig head prize pack)
Team Challenge:
Team
Team Average
1
Shane & Tas
138
2
The Mud Brothers
92.75
3
30 Fathoms
91.75
4
Portland Pescadores
91.25
5
Donkey Hunters
57.25
6
Grassy Whiting
50.75
7
FG Not
46.25
–
Stealth Fishas
46.25
9
Cheaters
40.5
10
Port Jacksons
39.5
11
Toadies
38.5
12
His Way
20.75
13
Banjos
20.5
14
Miller’s Militia
15.75
15
The Woodies
15.5
16
The Wrasse
7.75
17
JillyMacca
0
18
Hookt On
0
Individual Competition:
Angler
Points
1
Tas Roussos
205.5
2
David Fealy
169.5
3
Ben Pinniger
132.5
4
Stephen Kent
110
5
Lennon Doherty
82.5
6
Mal Donaldson
75.5
7
Shane Esmore
70.5
8
Christopher Dick
62.5
9
Rob Gloutnay
62
10
Paul Coghill
61.5
A massive thank you once again to all of the entrants that made the trip down the coast to support our comp, it was a great weekend away with a top bunch of blokes. To the offshore first timers, well done on surviving the wind, I hope you gained some useful experience and built up your confidence to keep giving it a crack. Thanks again to all of our event sponsors, please keep them in mind when making your purchases.
Last year’s weather certainly made offshore fishing difficult, but as NSC19 weekend drew closer and the long range forecast began to settle in, it started to look like Saturday’s weather might not be just good, but mint for the first session. Friday saw Melbourne swelter and messages rolled in from entrant on how best to get their kayaks and skis to Portland without melting as the mercury reached 47°C. Luckily by the time we arrived down the coast the cool change had already hit and unloading the trailer was a much easier affair.
The cool change hitting Portland on Friday afternoon
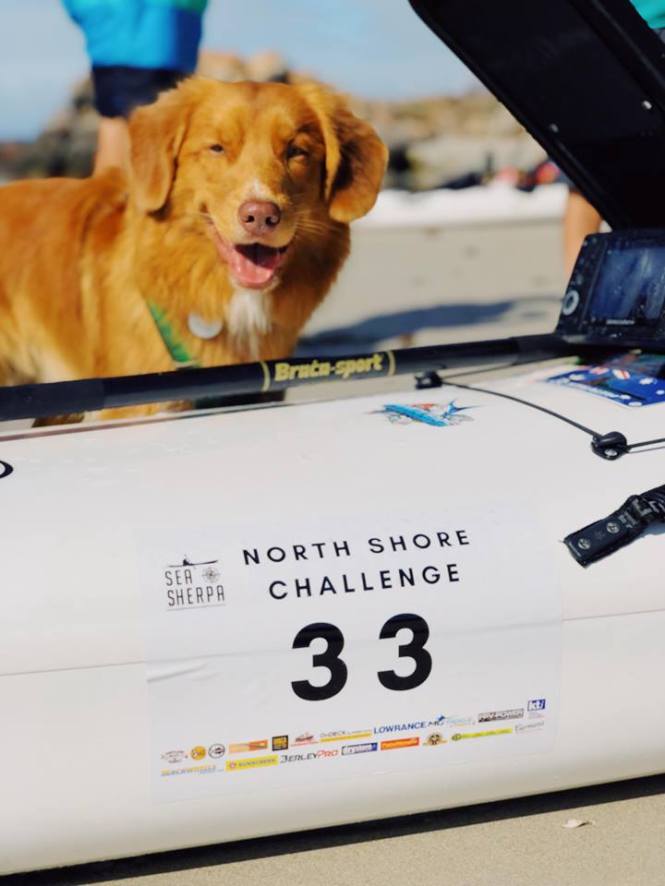
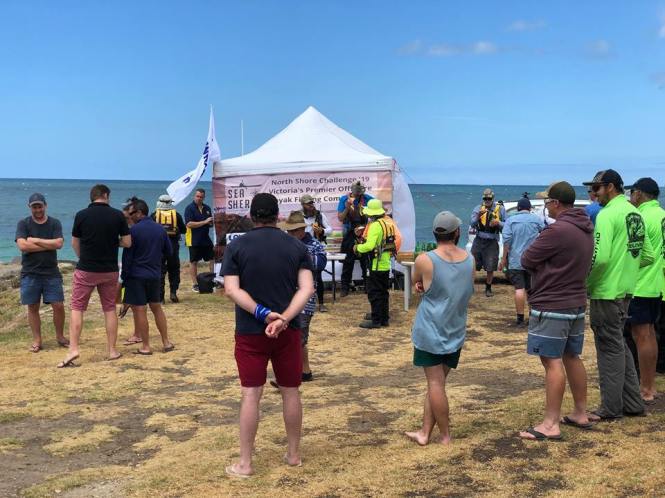
7pm saw the briefing take place up on the bluff with members of Coast Guard Portland in attendance to outline the use of smoke flares in an emergency situation out on the water. Welcome packs were distributed and this year saw the inclusion of boat number stickers to make admin and emergency procedures much more streamlined as well as making it easier for Cheater to find where he left his kayak.
Day 1 – (Fishing Window 6.30am – 2pm)
The morning launch saw mint conditions and a fishing window until 2pm gave entrants time to cover plenty of ground in search of pelagics. Early Yippahs over the radio from team Berleypro suggested that the kings had been located with a video coming through moments later showing Shane Elverd’s knots being tested by a solid king while the surrounding yaks couldn’t land any from that school. Rumours that the paddling within 10m of Marto has a similar effect on kings as a shark shield on noahs has yet to be proven, but there is certainly a strong case for it.
Shane Elverd with a cracking king
There had been a number of reports of kings out of Nunn’s beach on our arrival on Friday and a portion of the field had headed that way from the start. Mozz was glad he wasn’t relying on his bait tube from South West Rocks when he started pulling in 55cm slimies on his Jack Sayoris hard body. The first two were sent back out as livies for a double hookup soon after. The first rod was handed off to his team mate while he battled and landed the first king only for the second, larger model to bust him off once the rod was returned.
Jayme Morris with the first king to hit the beach on Saturday
The rest of the field were left to sort through undersized pinkies and rat kings in search of legal models in order to get some points on the board. As the session drew to a close at 2pm anglers had a steady following sea sending them back to the beach at Henty with Cheater’s GPS reading 16kph on the Profisha ‘without much effort’. The weigh in had twenty pinkie snapper entered to see thirteen anglers on the board after session one with 7 ½ points separating the top two anglers going into session two.
Thankful for the points on the board
Tales of bust offs by kings abounded over pizza and beers for lunch while Bill had caught the most unusual catch of the day – a cuttlefish on a smash squid soft plastic lure, that was after a king took a liking to the small soft plastic he was throwing around on a six kilo rod for snapper, which had a more predictable ending than the Titanic movie.
Day 2 (Fishing window 6.30am – 11am)
Launch on day two saw calm conditions but the wind had swung offshore and was due to steadily increase throughout the morning along with the swell, while the period was dropping. The shorter fishing window on Day 2 meant that Julia Reef was not fished, which was just as well as reports from the guys that had fished it on Day 1 said their sounder would have had similar screens sitting on the beach.
Day 2 Launch
The launch on Day 2 also saw the beginning of the Day 2 Dash with bonus prize packs for the first two people back to the beach with a snapper.First prize went to Nev Pollock with his Evolution proving it still has some mojo left. Tristan Davies was next to land a snapper but opted to fish on, figuring someone else would hit the beach first for second place as his was already out wide. That someone else arrived on the beach a few minutes later with Wayne Jensz taking out the second spot.
The cool weather on Saturday and rain overnight coupled with a drop in water temperature did not bode well for kings on Day 2. Sure enough the kings were proving hard to find Shane Esmore located a few but struggled to find the size he was after while William Filliponi also managed to tempt one in the 50’s.
Live update from William during the comp!
There were still some smaller snapper around that were happy to be hooked and Tas Russos managed to tempt a solid salmon, the only one entered in the comp but overall the fishing on day two was tough and the wind was making things a little bumpy out wide. As the 11am cut off drew nearer the field began the slog back to the beach. The measuring table saw very few wipes with only a couple of snapper upgrades coming in and many a tale of woe.
The Results
Early Bird Draw:
Winner: Peter Eaton (BerleyPro Orb Light)
Day 2 Dash:
Target Species: Snapper
Winner: Neville Pollock ($200 Dinga Voucher, AO Cooler, Buff, Dinga Shirt & Cap)
Runner Up: Wayne Jensz (Catch Fishing Lure Pack)
Masters (Entrants born in 1969 or earlier):
Winner: Tas Russos 41pts (Buff, Dinga Cap, Set of Easy2Hook Knotless hooks)
Team Challenge:
Team
Points
1
Long Zebra
77
2
The Mega Powers
73.5
3
The Fishas
69.75
4
Shane Plus 1
33
5
FG Not
20.5
6
Cheater & The Apprentice
18.25
7
Jolly Rogers
15
8
GT South
14.5
–
Glass is Class
14.5
10
Go Fish
14
–
Team BerleyPro
14
12
The Mud Brothers
0
–
The Westies
0
–
The Portlanders
0
Individual Competition:
Angler
Points
1
Shane Elverd
139.5
2
Jayme Morris
132
3
Tas Roussos
41
4
Nathan Wooldridge
36.5
5
Shane Esmore
34.5
6
Peter Ritchie
31.5
7
William Filliponi
31
8
Tristan Davies
30
9
Neville Pollock
29
–
Jeremie Steedan
29
A massive thank you once again to all of the entrants that made the trip down the coast in the sweltering heat to support our comp, it was a great weekend away with a top bunch of blokes. To the offshore first timers, well done on surviving the weekend, I hope you gained some useful experience and built up your confidence to keep giving it a crack. Thanks again to all of our event sponsors, please keep them in mind when making your purchases.
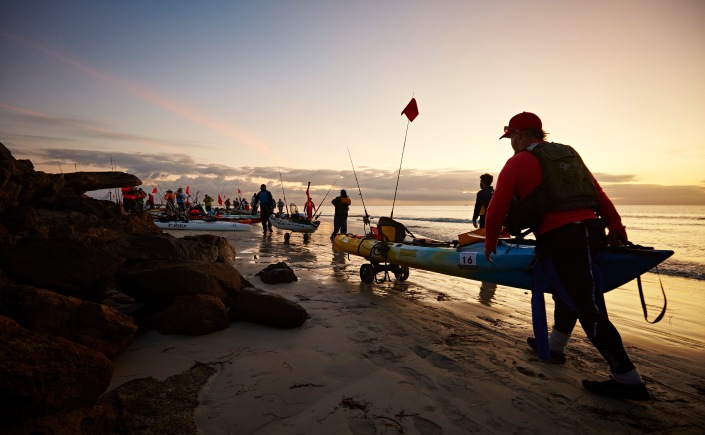
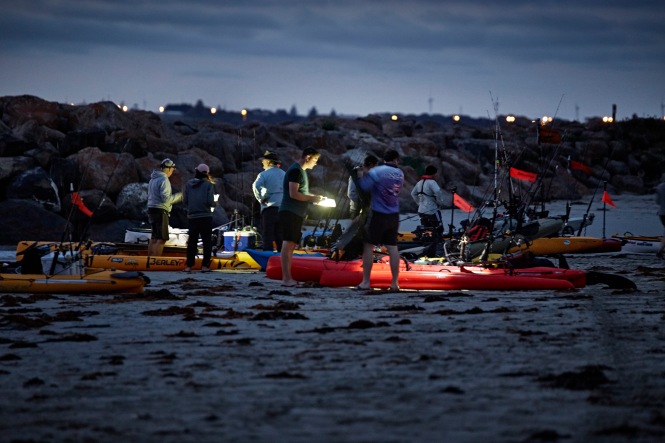
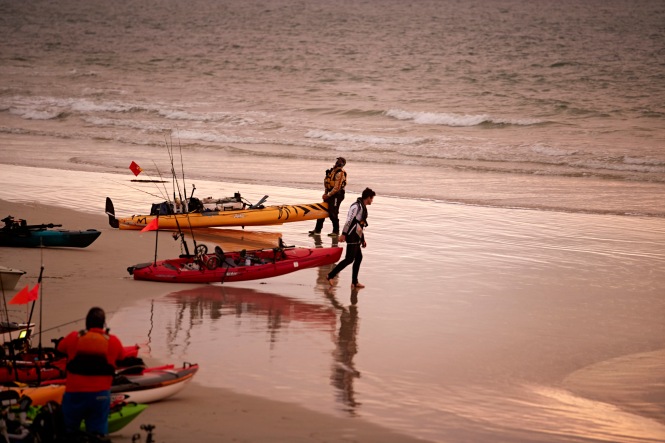
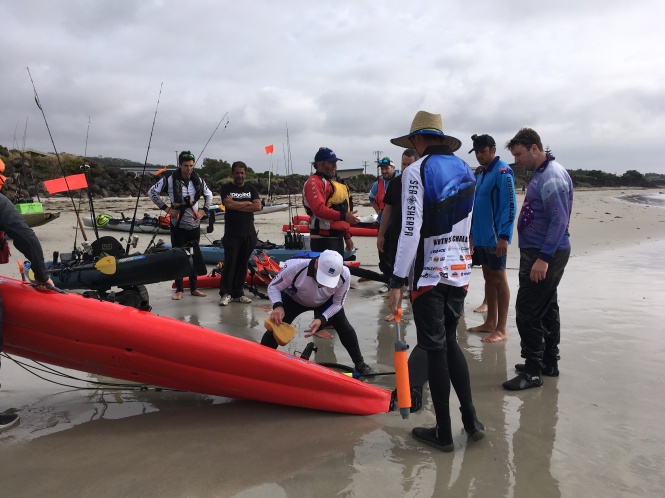
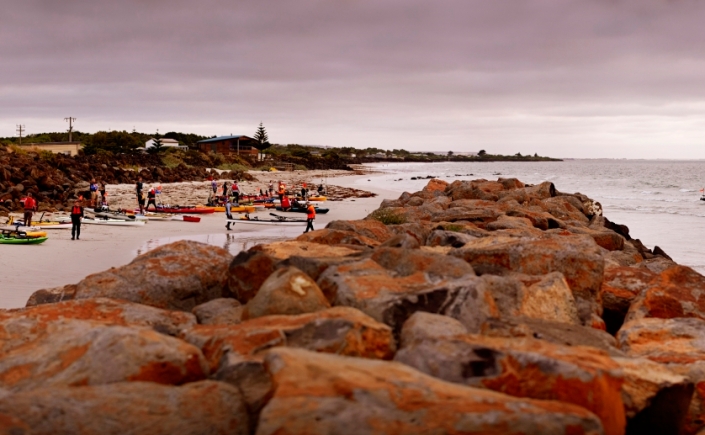
It is the morning after the night before, there’s a thick fog rolling in off the water outside and a dedicated few are hitting the beach to launch in a stark contrast to yesterday’s conditions where the promised 9 knot wind was actually 14 knts coming in from the South East in opposition to the prevailing South Westerly swells. Less than ideal conditions for yak fishing, but undeterred a flotilla of yaks and skis hit the beach in the pale morning light and began to set up for the day ahead. The Sea Sherpa crew hit the beach to conduct pre-launch safety checks and entrants began to roll into the admin marquee to collect their keytags in preparation for the 6.30 start.
A few looked at the conditions and decided against launching, leaving a field of 38 to take on the elements in search of point scoring fish. 36 of those managed to launch through the shorey unscathed, leaving a couple to go pedals up. Some gear was donated to increase Davy Jones’ already impressive collection. As per last year, the field scattered rapidly with some looking for shelter from the easterly over behind the break wall while others threw caution to the headwind and headed for the horizon. With the wind increasing as time passed, a couple of entrants returned to the beach looking a little green around the gills deciding to pull the pin. Apparently the shallow reef had plenty of natural burely. Luis returned to the beach to pick up his forgotten key tag and nabbed a quality salmon on his way, making it worth the trip back in.
Radio chatter indicated kings were around and 8am saw the 12m Coast Guard vessel join the patrol crews from Portland Bait & Tackle and Portland Surf Life Saving already on the water. Tas’ accidental decision to turn his whole AI into a livewell, predictably resulted in a SOS call via VHF and Rescue 1 was deployed to his location. He and Kieran were struggling to bail his swamped AI so the call was made to do a tow-back, with his ama on the front of the RIB and his AI running as a shallow-diving hard body on the way back to the beach. Despite a bubble trail that Williamson would be proud of, he failed to hook up on the way back in. An unfortunate end for his comp, but lucky that it occurred in the comp window given the availability of support crews on the water. Even when back on the beach, it took a crew of six quite a while to drain the hull.
Back at the admin tent I was anxiously watching the screen with updates on the wind conditions, and at 15knts the wriggle room was beginning to disappear so I radioed the field to let the guys heading for the horizion know that with the increasing trend there was a fairly high chance we would hit our 17knt cut-off point. Sure enough within an hour the wind had hit 18kts and in line with insurance and our safety procedures I had to make the call to cut the comp short and recall the entrants to the beach. Some opted to land in the harbour and avail of the Sea Sherpa shuttle service, while the Coast Guard looped out the back to follow in the paddlers out wide. The CG pilot reported difficulty keeping up with GAB paddling back in from behind the Anchorage.
Just as I was pondering what to do with the Best Catch award and prize this year if no pelagics were caught, Lennon hit the beach with a quality king and others began to hit the beach with pinkies and squid and it began to look like we would have enough fish entered to fill all of the prize slots despite the shortened comp time frame. Luis measured in the salmon he picked up and it went 62cm to the fork a quality fish for the species. A number of entrants picked up pinkies for their tally and Shane and Gab both took advantage of squid being an allowable species to pad out their bags.
Results
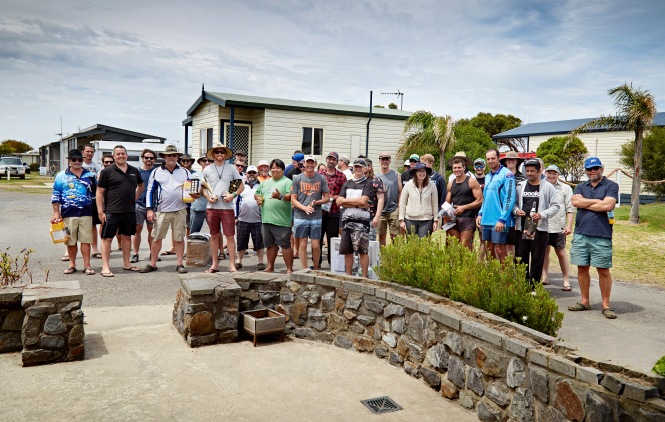
As the BBQ was already booked in for 2pm with the Henty crew, the entrants had the opportunity to pack up gear and chill out before the ceremony, while a brave few decided to brave the conditions until after lunch. Two o’clock came and the Henty crew began to serve up some grub and the prize ceremony began.
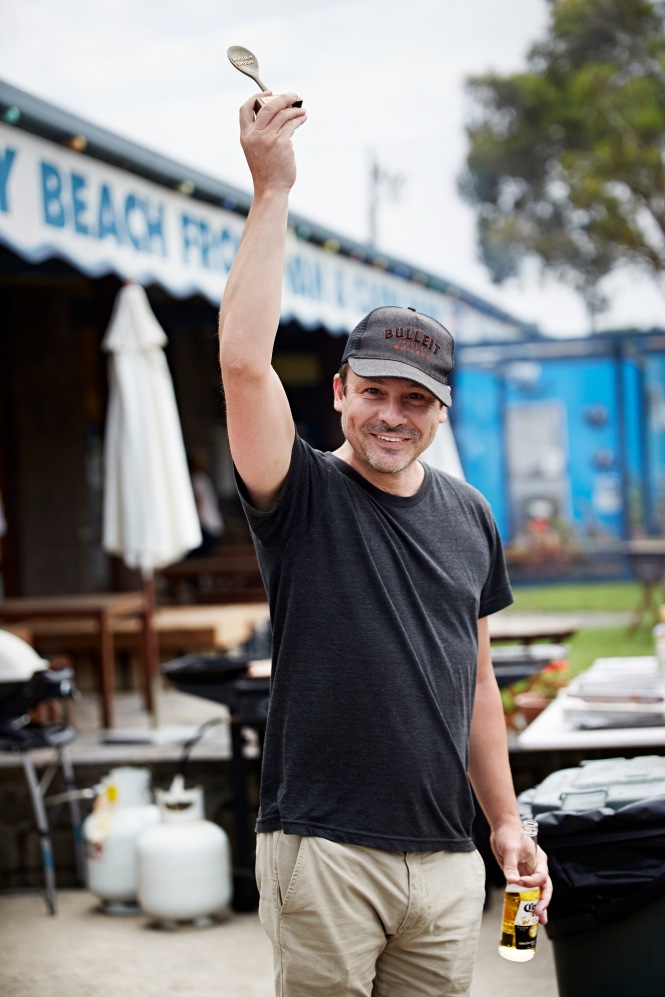
In the Teams Comp, it was hard to separate the bottom two in order to award the wooden spoon. In the interest of fairness, but mostly to decide who was slightly less rubbish on the day a round of rock paper scissors was called for. Jack stepped up for Team Berleypro and for Glass is Class, Crazycheski took the podium. Unbeknownst to Jack, Steve Chen was given the name Crazychenski after an all-in round of rock paper scissors against Vladamir Putin. Chenski won a Commdore 64 that day, and was feeling confident as he came to the front. The round ended predictably and Jack along with team Berleypro were left to bask in the glory? of propping up the results table with a doughnut.
At the other end of the table, the Team Challenge title for 2018 went to the Westies with Lennon’s kingy combined with some local knowledge from Spider saw them get across the line with a team average score of 37 points. Each team member walked away with a $60 voucher for Jigman, a headscarf from Buff, a Pains Wessex Flare kit and a waterproof container for their safety gear.
The Westies
37.38
Pedal Pushers
14.75
Team AI
9
Notunas
7.5
Bream Busters
7.25
Man overboard
4.67
Glass is Class
0
Team Berleypro
0
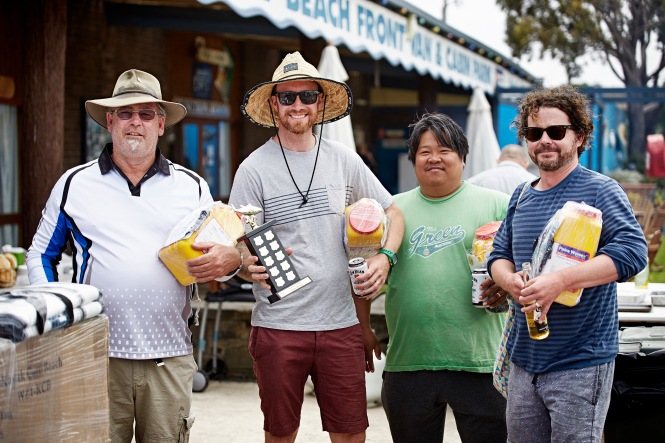
For the Best Catch award it was an easy decision with only one eligible pelagic caught during the comp window. Ben from Portland Bait & Tackle was on hand to present Lennon with a Shimano Torium reel and the Best Catch trophy for 2018. In the main event it was again Lennon who took the honours and the top ten shaped up like this:
Place
Name
Fish
Score
1
Lennon Doherty
89cm Kingfish
133.5
2
Luis Ferreiro
59cm Salmon
59
3
Shane Esmore
31cm Snapper
29cm Snapper
25cm Squid
21cm Squid
53
4
Chris Tyerman
33cm Snapper
32cm Snapper
32.5
5
Gabriele Meoni
27cm Snapper
22cm Squid
24.5
6
David Webb
32cm Snapper
16
7
Peter Ritchie
30cm Snapper
15
8
Stephen Kent
29cm Snapper
14.5
9
Geoff Smith
29cm Snapper
14.5
10
Nelson Rouw
28cm Snapper
14
Special mentions to those who peaked a little early or a little late, managing to get kings over the comp weekend. Tas was first cab off the rank with a king less than a km from the launch. Both of the Ians also managed kings after the comp using cephlapods as bait.
A massive thank you to all of the entrants that made the trip down the coast to support our comp. Two years in and hopefully looking good for a third. It was unfortunate about the weather cutting the day short but I think almost everyone that made the trip down got on the water at some stage throughout the weekend. To the offshore first timers, well done on launching in tough conditions, if nothing else I hope you gained some useful experience in an environment as controlled as you can hope for in the Southern Ocean.
For those that couldn’t make the trip, here’s the photo reel of all the goings on thanks to our three talented photographers, Damian Goodman, Amy Rouw and Jennifer Ngo, its as close as we can get you to the action.
Time for a month’s break then its back to chasing up sponsors and organising the next one. In the interest of fairness next year I’ll put one red AI on each team!
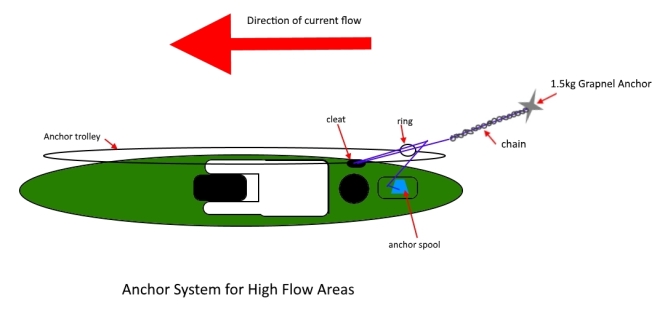
A well set-up anchoring system is a handy piece of kit, allowing you to safely and easily set and retrieve anchors especially in high flow areas. A good anchor trolley has multiple uses and can be used to connect any of the following to your ski:
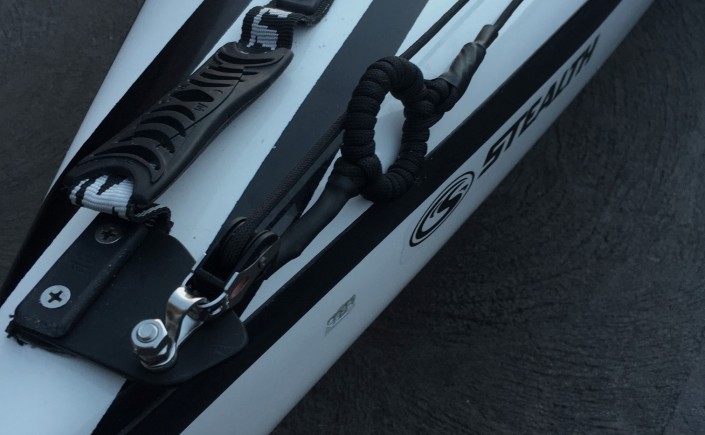
The anchor trolley is a pretty straight forward piece of kit, essentially a set of pulleys at either end of the kayak, some paracord running between with either end connected to a ring. This allows items to be clipped to, or threaded through the ring to be moved from the front of the kayak to the back. The key with installing the anchor trolley is to have the pulleys installed right at the tips of the kayak. This will ensure that the kayak sits straight in the current when the anchor trolley is sent back rather than swinging/sitting at an angle when the rear pulley is installed too far forward. It is also a good idea to wrap the ring using some of the excess paracord. On glass skis, it helps protect the gelcoat in transit when the wind can make the trolley hit against the side of the kayak. It can also dampen noise when using stakeout poles near easily spooked fish.
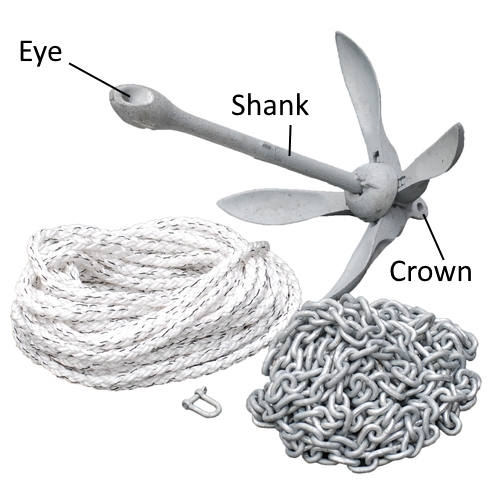
Assembling the anchor
Attach one end of the chain to the crown (bottom) of anchor using the D-shackle.
Run the chain along the shank and connect to the eye of the anchor using the cable tie.
Attach the one end of the rope to the end of the chain and the other end should be secured to the hand line spool.
Wind on the rope to the hand line spool and you anchor is ready to go.
Remember that any time you add cords or ropes to your kayak you should carry a safety knife capable of cutting them in the event of entanglement.
Setting and Retrieving your Anchor
The goal is to be able to lift your anchor without having to bring your anchor trolley back to mid-ships. In high flow areas, this will cause your kayak to turn side-on to the current and potentially capsize. Instead, the goal is to set up your anchor system so that it can be released without having to adjust your anchor trolley.
Setting Anchor
It is generally best to take your time and anchor properly rather than rushing it and ending up in the wrong spot. There is nothing worse than dropping anchor and getting ready to set your lines up only to find you have drifted into a channel of off a mark.
Navigate to close to your mark and have a quick drift over it, this will give you a track on your sounder of your drift. (You can do this visually if you don’t have a GPS sounder.
Track back to up-current of your intended mark (the longer the process takes you the further up-current you should start)
Spool out the required line onto your lap. (usually 3 times the depth of water)
Double over the line and pass it through the anchor trolley ring to a cleat – (don’t connect it directly with a carabiner in a high-flow area)
Send you anchor trolley back to the rear of your kayak and
Lower your anchor overboard on the up-current side allowing it to bed in and anchor your kayak.
Take care not to lower you anchor over the down current side of your kayak as this will cause your anchor line to run under your kayak risking a capsize.
Lifting your anchor
Lifting anchor is by far the more dangerous of the two, in terms of capsize potential, especially if you move your anchor trolley away from the back of the kayak towards the amidships, which is the case where people clip anchors directly to the anchor trolley via a carabiner. The goal is to disconnect your anchor from the kayak, spin 180 degrees to face into the current and then wind up your anchor line onto the spool. To achieve this safely, follow the steps below in order.
Grab your anchor spool in your left hand (assuming a starboard side anchor trolley).
Let off enough line from the spool to be able to place your anchor line behind your foot (or a front rod holder) This will create a pivot point for the kayak forward of the centre to help it turn into the current.
Undo the cleat and let the current pull the anchor line out through the trolley ring.
Depress your rudder pedal to turn up current, pull on the anchor spool, keeping the anchor line behind your foot. This will swing your kayak 180 degrees to face into the current.
Gradually wind your line back up onto the spool as the kayak moves forward into the current.
When the anchor line becomes almost vertical the anchor will release and come up.
If the anchor is lodged, give two sharp pulls on the anchor line while keeping your body over the centre line of the kayak. This will break the cable tie and release the anchor backwards.
For fiberglass owners, be careful of the chain and anchor on the way up try not to let it hit the side of your ski. You can add some electrical tape to the anchor line .5m up from the chain as a visual warning.
Pack away the anchor and rope to avoid entanglement in the event of sloppy conditions or an accidental capsize.
Trip Planning – Tides
When planning your trip it is best to plan around the tidal flows. You can use the tidal flows to assist you to get to your destination as well as timing your trip so that you are setting and lifting anchor in the safer portion of the tide. The water speed varies throughout the tide and can be approximated by the 50/90 Rule outlined below. The end of the third hour after the tide change is the worst time to be lifting anchor in a high flow area as the tide will be running at maximum strength. This is why it is common for kayakers to fish an area like this one hour each side of the tide changes allowing you to make the most of the tide assistance for your trip. Let’s say your mark was <10km from your launch, you could put in between the third and fourth hour of the run out tide, paddle to your mark and be dropping anchor at the start of the fifth hour as the water is starting to slow down. You could then fish across the tide change and the hour after upping anchor as the water speed is starting to pickup again. You could then use the increasing water to carry you back to your launch spot.
For me this is the best way to fish areas like Lang Lang in Western Port. You can launch at the ramp at Lang Lang with 1m of water left in the tide curve and use the run-out tide to get to Jam Jerrup bluff, fishing across the low tide change, and returning to the ramp on the flood tide. To launch or retrieve at most areas in the top end of Western Port you will need to have at least 1m of water on the tide curve. This is particularly important because over a low tide all of the water will drain out to leave a mud plain, leaving you stranded until the water returns in six hours. In terms of deciding to fish over the high tide or the low tide, the high tide gives the flexibility of being able to come or go as you please but it is harder to pin point the fish. Over a low tide, you are committing to a longer session on the water so it is important to know the weather forecast, and have food, water and sunscreen for the session. The upside is that the fish will retreat to the channels making them easier to find.
They say there is a reason why the footy finishes in September… and in yards all over Victoria, the frustration of teams getting knocked out of finals is taken out on kayaks and boats as winter tarps are lifted and pressure washers are put to good use. Richmond yaks are usually cleaned in August, but this year the dust gathers a little longer…
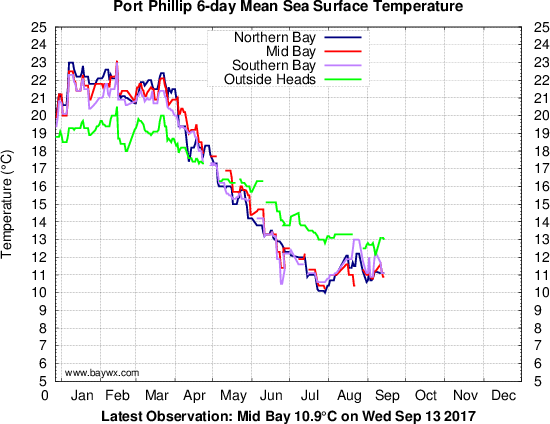
As with most things, every yak fisho will have a preferred technique, bait, lure, spot etc for chasing snapper, and there are plenty more seasoned snapper whisperers out there than myself, but this might give kayak fishos chasing reds for the first time a starting point for the upcoming season. The main run of reds occurs when the waster temperature in the bays reaches parity with the water temperature offshore. This generally occurs in October, but can vary depending on the weather conditions. You can get an updated version of the graph below, here. As you can see, currently the bays are still a little cold so the big influx has not yet occurred and fish being caught this time of year will most likely be fish resident to bay that can be caught right through the winter.
I have two sets of snapper gear – one for each bay, mainly because in Western Port the tides run harder and snapper use them to their advantage but also because in Port Philip Bay I normally use plastics and hard bodies, whereas in Western Port I usually bait fish due to the water clarity in the top end.
Port Phillip (plastics) – 4-6kg Graphite rod, 12lb braid mainline, 2500 to 4000 size reel
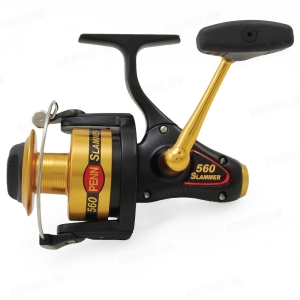
Western Port (bait) – 6-10kg Glass rod, 20lb mono mainline, Penn 460 Slammer
You can run braid on your bait set-up too if you like, especially for deeper water as it will lessen the bow in the line up through the water column, but when using braided lines its really important to back your drag off as the fish nears the kayak. If they go for that last ditch run to the deep you can often pull hooks as the braid has no stretch and loose your fish yakside. In the braid vs mono debate, I think braid has a better hook up rate and is my preferred for Port Phillip Bay, for Western Port however I prefer mono because for the fact that most of the places I fish for snapper there have a good chance of a gummy or a big ray as by-catch, both of which will collect all of your lines causing you to bust off leaders on your other braided line. The resultant tangle is also easier to undo with mono, getting your lines back in the water and fishing quicker.
Lures:
Soft Plastics – There are three types of plastics I tend to use on snapper, but I’m sure others will work just as well when there is a hot bite.
Worms – check out Munroe’s caramel eclair or Gulp turtlebacks in camo
Jerk shads – smelt or nuke chicken or motor oil Zman’s are good starting points
Squid types – check out zip- zits if you can find them (hard to get these days), I’ll be checking out the new smash squid this season as a replacement.
In terms of jig heads, go as light as possible to get your plastic to waft down through the bite zone. Snapper are more likely to take it on the drop than dragging along the bottom like a flattie would. Most of the yak spots are not that deep – 15m or less and without much current you can get away with a 1/8 or 1/6 jig head and then match the hook size to the size of the plastic.
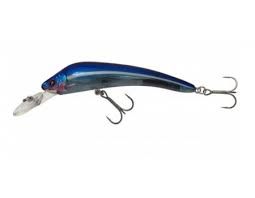
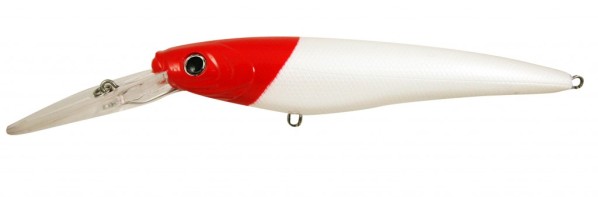
Hard Bodies- These range in size and therefore in the size fish they can handle, the Frenzies (after the humble Tassie devil) have to be one of the best bang for buck lures around. They generally attract pinkies rather than monsters, which is just aw well as a monster would chew through one, but are a handy lure to have in the tackle box for trolling on the way out to a mark. I’ve listed the red head below but the silver with red belly models are good too. Make sure you upgrade your hooks on them a) because trebles on a yak hook everything once you bring a fish on board and b) I think singles do a better job of penetrating the hard snapper mouths.
For a heavier fish you’ll probably need to run a slightly larger lure, like a Sebille Koolie Minnow or a classic Rapala taildancer.
Frenzy – QANTAS red head (trebles swapped out for better quality singles)
Koolie Minnow – 76mm in BRB
Rapala Taildancer (~10m of water)
Koolie Minnow
Berkley Redhead
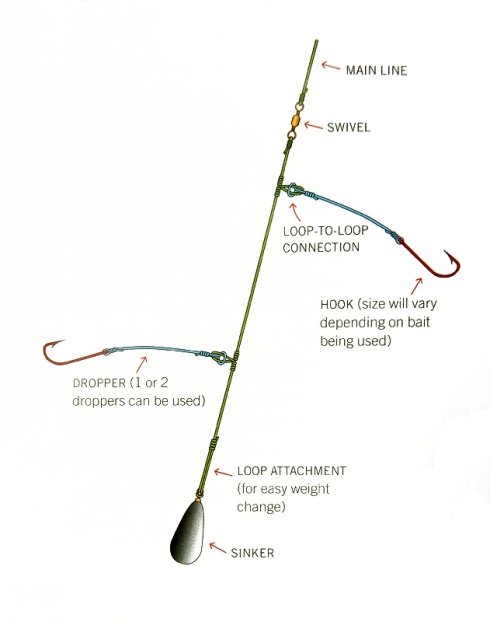
Rigs:
When the snapper enter the bays at the start of the season, they have quite sharp teeth that get worn back as a result of gorging on the shellfish the bays provide. As a result early in the season I tend to run slightly heavier leaders, dropping down as the season progresses. You can also have finicky biters early on so I start the season with thin gauge 4/0 or 5/0 suicide hooks, switching to circles when the season is in full swing in late October and the snapper tend to hit the bait and run. I run a standard running sinker rig in Western Port with and Ezy-rig with a 20- 30cm dropper to the sinker. If you are chasing the bigger models, a twin hook set-up on 30 or 40lb leader will do the job you can match the spacing of the hooks to the size baits you want to use. For Port Phillip Bay however, I try to use the least amount of lead possible if any at all. I use the same two hook rig but instead of the ezi-rig, I just use a small pea sinker running to the hook with a lumo bead to protect the knot or at the top of the bay just some splitshot. This YouTube video by SpedzaGoFishTv outlines how to make a twin hook rig pretty similar to how I do it.
If you are chasing pinkies, then you can use a simple paternoster rig over the shallow reefs, similar to what you would use chasing whiting just a little heavier (~15lb). If you are snagging up a lot you are probably anchored right on the reef. You can anchor just behind the reef edge and draw the fish to you with the berley or try a lighter line class to attach the sinker, which will break in the event of a snag. You could also use an enviroweight attached with an elastic band. Also make sure your anchor has a break-away cable tie fitted, to prevent it getting stuck in the reef, more info here.
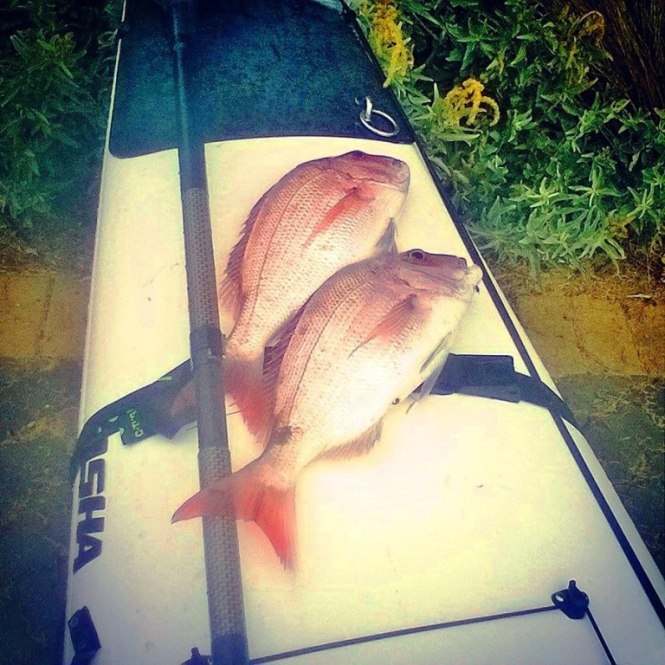
Image credit: jazclass
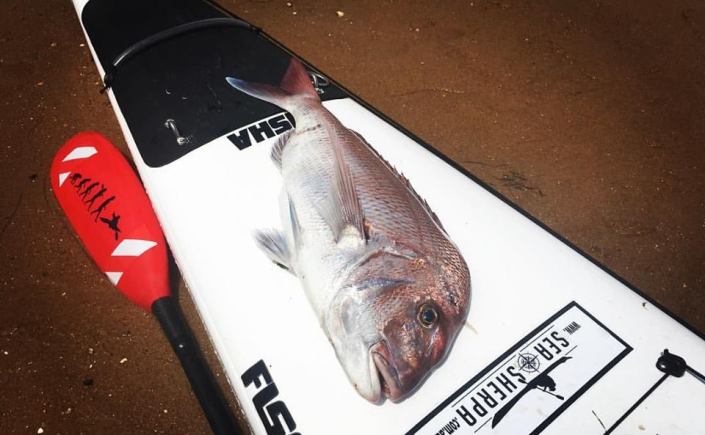
A pair of pan-size pinkies; perfect size for cooking whole.
Baits:
When it comes to bait, you’ll often hear the saying that fresh is best, but sometimes the snapper are just fussy and will take a three time defrosted old pilchard over a fresh squid head, so it’s probably better to say a range is best. I also try to offer up things that are local to the area on the rods if possible and will have frozen stuff as a backup. If I have time in advance I’ll try to do a bait collecting session prior to my trip to give me un-frozen bait. In WP it can be easy to do some bait collecting in the time leading up to the tide change to have fresh baits out at the right time. You can bait up a small hook rig to nab a small salmon to cut up into strip baits. You can also go crab hunting before you launch in some areas. In Port Phillip I try to squid hunt the day before allowing me to save time on the day and get lines and a berley trail going well before the sun comes up. I’ll normally run two or three bait rods on the yak – a combination of pilchard, squid, salmon, crab, pipi or saurie. I used to use banana prawn too but unfortunately outbreaks of white spot disease have now made this unsuitable for use as bait to prevent contamination of our waterways.
Berley:
My berley making is an all year job, which involves having a small bait freezer in the shed. If you are lucky enough to have this set-up you can keep your fish carcasses, off-cuts and old thawed bait in the freezer until you have built up enough stock to make a batch of berley. This ensures nothing goes to waste while helping your catch rate in snapper season.
The first thing you’ll need to do is pick yourself up an old-school meat grinder. You can get them at op-shops or on eBay for not much cash – it is probably best to have one dedicated for the job! To make a berley mix I grind up the carcassases, offcuts and bait that has got freezer burn, or have been thawed and re-frozen too many times. To this I add something that will expand in the water and slow down the berley flow rate. You can use the crushed up Weetbix from the bottom of the box, stale bread, or chook pellets. To finish up add some tuna oil – enough to make the mixture wet enough to mould, but dry enough to stay in a ball once formed. Freeze it down in sandwich bags and you are good to go.
Fishing Spots:
Port Phillip Bay Pinkies – Depending on your level of experience there are plenty of spots in PPB to chase some fish. If you are chasing pinkies, you can get them most of the year at Altona in the West, or Half Moon Bay on the East side. At Altona, the parking is free at Miller’s Rd launch and you only have to paddle a short distance. You can anchor up behind the shallow reef (line up with the Pier and the rock groyne) and use squid or pipi on the paternoster rig. You’ll feed a lot of hungry piranhas to get the size models, but you’ll have lots of fun. Over at Half Moon Bay there are a number of good spots within 2km of launching at Blackrock ramp. The Anonyma Shoal and the 15m contour are within easy paddling distance for suitable bay craft.
Chasing Bigger Reds – The snapper or pinkie debate depends on the angler, for me its fish above the half meter mark qualify as snapper. In Port Phillip Bay, catching bigger fish is about timing. You need to be up early. They raid the reefs under cover and once the sun comes up they move out to deeper waters. If you are launching at first light onto a shallow reef like Altona, you have already missed the boat. I prefer the deeper water off Willamstown or out behind the Cardinal at Altona. Get out on the water at 3am and have your berley trail going and baits in the water long before the sun is thinking of coming up.
In terms of conditions, you can put in lots of hours trying to get your first big red, and while they can be caught randomly in all sorts of conditions, researching the weather will see you spend your time more productively. You’ll hear plenty about barometer readings, wind direction and tides making it hard to know when to go. Obviously, spending more hours on the water will result in more fish, you can’t catch them sitting on the couch, but if you are limited on time here’s what I look for: I reckon the bigger snapper prefer bumpy water so chasing them in PPB you’ll need a kayak and experience suitable for these conditions. I like fishing the day after a big southerly blow as it stirs up the food supply and brings the fish in. Ideally I want a high tide change. If you get a tide change at first light, rising barometer and a southerly the day before that’s when you take a sickie at work! Look for combinations of the above when deciding whether or not to use your leave pass.
Western Port is a bit easier in that the murky waters give snapper more confidence and good fish can be caught throughout the day. In Western Port the tide changes still play an important role in both the fish biting and the conditions you will be fishing in. Try to fish around the tide changes and starting out its best to fish in all-tide launches like Coronet Bay to give an extra margin of safety. Lang Lang and the top end can see some great fish too but you need to know how the tide effects the area to avoid the mud. Its best to fish these areas with someone with local knowledge the first time. Down the bottom of Western Port sees great fish come from the Corals but the tide down here runs hard. You need to understand the 50/90 rule and gain experience anchoring in tide flows to fish these areas. It is also recommended to have quick release anchor setups to avoid getting side-on to current and potentially capsizing.
Spots to try:
Williamstown – Launch from the Angling Club ramp (with permisson) or from the rock circles at the bottom of Coles street and paddle out to the left in front of the footy oval. Sound around for arches before anchoring and setting up your trail.
Altona – Launch from the end of Miller’s Road and paddle out to behind the Cardinal. There will inevitably be boats in the area already so sound around and try to find a spot to yourself. If the fish are on and word is out it will be a carpark but good fish come through the area.
Rickett’s – is probably one of the best known snapper spots in Melbourne and often one of the busiest. Paddle out behind the marine park (marked with buoys or use the Can I fish here? feature of the Vic fishing app if you are not sure)
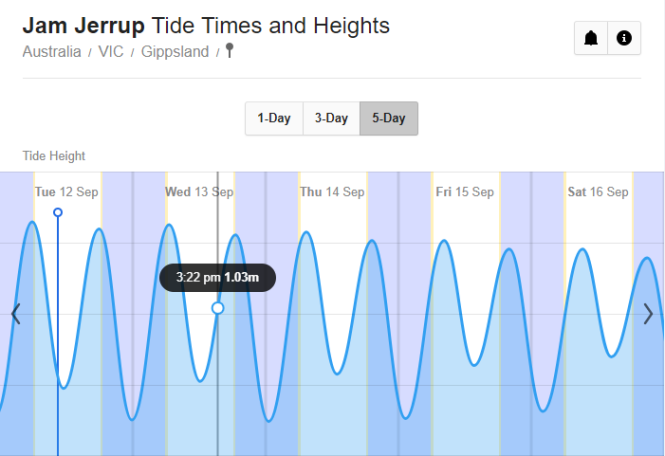
Lang Lang/Jam Jerrup – Fishing the banks over a high tide is the safest move for beginners, you’ll need at least 1m of water in the tide curve for Jam Jerrup to have enough water to launch and retrieve safely. You can use the tide charts to find out your fishing window, but leave some leeway as they are not always accurate.
Willyweather Tide Curve
You can also fish the forks in the channels over a low as the fish will retreat into the channels as the water drops. You can easily pickup flake as a by-catch through here which isn’t a bad consolation prize!
Coronet Bay – This area is essentially a large grazing ground that all sorts of fish come through. There are no real set ‘marks’ its more a case of paddling out a bit and setting up your offering and settling in to see what comes by. The friendlier water is closer to the launch, the tide rips over at Elizabeth Island and the area between Pelican Island and Snapper Rock is not recommended for beginners – its known as the washing machine for good reason!
Lighting:
One last thing you’ll need to sort out to chase snapper is a proper light. It is a legal requirement (Under the Colregs) to be able to display a white lantern in sufficient time to prevent an accident when underway in a non-powered vessel. For snapper fishing, it is best to aim for being as visible as possible on the water. A headlight generally won’t cut it. There is a lot more boat traffic on the water this time of year, a portion of which are once-a-year boaters that only fish a couple of trips during snapper season. Another consideration is that kayaks are comparatively, very low to the water and a larger boat up on a plane while moving between spots simply won’t see your kayak but has a chance of seeing a light up higher.
In terms of rigging your light, I’d recommend mounting it behind your seat and high enough to be seen over your head. Keeping the light behind you helps prevent it blinding you and makes it easier to paddle along. You can buy suitable lights lights like the BerleyPro Orb or Railbalza navilight ready made, or if you are handy with a soldering iron, you can make your own using LED strips wrapped around PVC pipe. All will do the job better than none and help stop you becoming a speed bump out on the water!
BerleyPro Orb
I’m sure there is plenty more that could be added, but that’s probably enough to get you started. I’ll add some more photos of my tied rigs during the week.
For those new to offshore or just new to our comp, I’ve put together a quick run-though of some of the gear you might want to pack for the trip. It is one of those ‘What is the best soft plastic?’ type of questions, as everyone will have their own ideas on equipment and gear, but here’s a quick run through on what’s legally required and some of the gear I tend to use as well as links to where to find them. It might help you narrow your search a bit. At first glance it may seem like a lot, but not all of the gear will be relevant to each kayaker and the margin of safety needs to be higher offshore as the distances covered are usually much longer and you have the added variable of ocean swells to contend with.
Safety Equipment
First off let’s cover the mandatory safety equipment to meet legal requirements, even if you plan on fishing coastal inshore it is best to be geared up for full offshore as the equipment is smart to have on board anyway and you may find yourself beyond the 2nm line if you are following the fish!
The following items are not required legally but are highly recommended. Note that a safety flag is a requirement of the comp though, due to feedback we received from boaties in the area last year.
Everyone will have their preferred brands when it comes to gear, again I’ll outline what I use and then you can chase up gear in the weights and capacities outlined in your own brand of choice. With offshore kayak fishing, we can generally run much lighter gear than the boaties use because of the style of fishing. On a boat when fighting a fish a lot of pressure is put on the system – line, knots, rod, drag etc, whereas on a kayak there is a limit to how much pressure we can actually put on a fish before we start getting towed. For this reason, we can run much lighter line classes and there is no need for big-drag reels as you will never be able to use that drag on a kayak in practice. The gear I use is intended for the school fish that I am chasing, you’ll be under-gunned on a barrel tuna, bu then you wouldn’t fit one in the fish hatch anyway!
Trolling
I also tend to look at my offshore trolling gear as being somewhat disposable, I don’t have to cast with it and if it gets pulled from a rod holder or dunked I don’t want to lose hundreds of dollars’ worth of reels. For this job I tend to favour ‘clunker’ reels that don’t have the refinement of your top end Shimanos and Daiwas but are robust and can take some abuse. I usually carry two Penn stiff tipped glass rods in the 10-15kg weight range paired with Slammers in the 560 class spooled with 30lb braid. They have plenty of usable drag and enough line capacity for school fish at Portland. I’m not casting with them all day so the weight isn’t an issue, they are very easy to strip down and maintain and if a combo should happen to go swimming I’m not out of pocket for very much. A mate of mine that uses the same gear once said “Tell me a reel from Shimano or Daiwa that you can buy for $70 (on Dinga) that you would confidently take offshore to land a tuna on?” You could also go slightly more upmarket and use Uglysticks paired with Spinfisher V’s to give even more water protection and have less frequent strip-downs. In terms of rod length, for trolling I still like a bit of length as it helps to avoid tangled lines out the back, when you have to do darting turns to chase after a bust-up or diving birds. For this reason I don’t run two short trolling rods, usually either two longs (6’6″ – 7′) or a long and a short. If I’m running a long and a short the long rod will be weighted or have a deep diving lure while the short will go straight out the back. Again this helps avoid tangles by letting the lines pass over each other when turning.
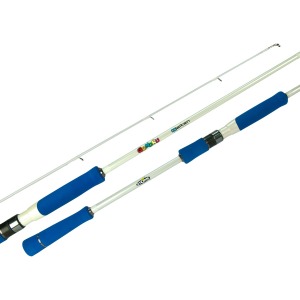
Casting
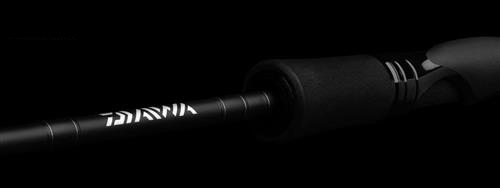
My casting set-up generally will have a nicer reel and it is usually the only setup I leash on the yak; (I prefer less things to potentially get tangled in). Again, I like a rod with decent length to get better casting distance, personally I don’t see the point of the range of really short ‘kayak rods’ that manufacturers seem to be churning out – they don’t cast very far and you can’t pass your line around the nose of the yak to follow a fish. I like a rod around 7ft usually in the 8-15kg class. This can be matched with a ~5000 size reel with nice smooth drag and decent line capacity for 30lb braid. There are plenty of options in this category of reel depending on how much you want to spend; Stradics, Saragosas, Saltists, Slammer III’s or Conflict, Sorocco SW and Lethal on the cheaper end. It might also be worth having a read of some Alan Hawk reviews to get up to speed with the pros and cons of each offering. Offshore gear will tend to cop plenty of water so serviceability will also be important. Alan Hawk reviews mention difficulty in getting replacement fluids for mag seal units so for my next purchase I’m leaning towards the Sorocco SW.
At the moment I’m running a Gen Black Nugget, I’ll most likely pair it with a Sorocco SW in 6000 size to edge out my original plan of a Conflict. I plan on dabbling in some jigging too, so when a Gomuku Kaiten comes my way, I figure it could be paired with the same reel as a nice jigging combo. I’ll do a review on the combo once its had a bit of use.
Electronics
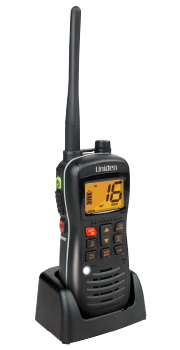
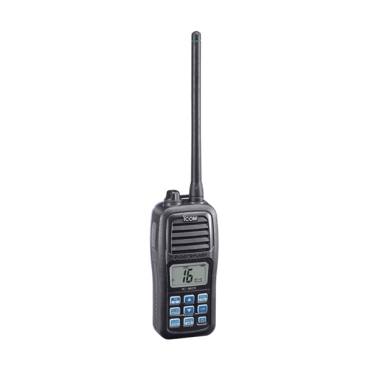
VHF Radios
I’ve owned a couple of radios and found some more robust than others. When you go shopping you can pay a little more for a DSC enabled unit, but as an added safety feature it will communicate your GPS coordinates to all DSC vessels in the area in the event of an emergency.
The Icom M series radios are generally considered to be one of the best units around, they are very popular with the offshore yakkers up north. Personally I love my Uniden MH, it hasn’t missed a beat. You can also buy a waterproof sleeve for your radio too which will help protect it in the surf.
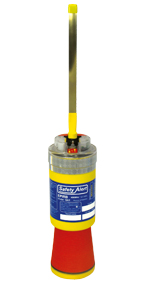
Emergency Position Indication Radio Beacons (Epirbs)
EPIRBS are one of those items that are expensive as an initial purchase for something that you hopefully never have to use, but when the cost is broken down over their usable life it becomes a more attractive proposition. The average beacon has a 10 year battery life and if they cost $250-$350 to buy really you are looking at $25 a year. I got my first EPIRB a few years back it was a GME MT600 unit, from memory it set me back around $250. I’ve never had to use it in anger so I can’t comment on its reliability, but I will say that newer units can be purchased with GPS in-built which dramatically improves location accuracy and therefore the search radius should you need to deploy it.
This unit is now available as a MT600G GPs version for $330, but when the battery goes on the current model, I will most likely opt for the more compact offering from Kti, the SA1G. It is a little cheaper at $290 and locally made so it will make life easier if there are any warranty issues.
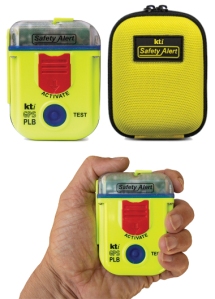
Speaking of Kti, they also make compact Personal Locator Beacons (PLB’s). These are easy to fit in the pocket of most lifejackets and while they don’t meet the legal requirements for full offshore fishing, they are a good piece of kit to have on any type of water. The main advantage of a PLB is that if you are separated from your kayak, your PLB will still be with you, in the pocket of your PFD whereas your EPIRB will be floating away from you on your kayak. The trade off is that unlike an EPRIB, which floats and transmits once activated without further input from the user, a PLB must have its antenna facing upwards and be held afloat by the user.
The Lure Box
Depending on what is on the chew in January you’ll need to decide on a means of targeting the comp species. With the bread and butter species, like in the bay you can opt for soft plastics or baits. If you want advice on plastics and jig heads you can go straight to the source and have a chat with a couple of our comp sponsors. Allan over at Munroe’s Soft Plastics is always happy to provide advice on plastic choices and John over at Jigman can sort you out with terminal tackle that should see you right to get some points on the board on the day. Both are top blokes, happy to talk fishing and it is always good to give back to the local companies that support us.
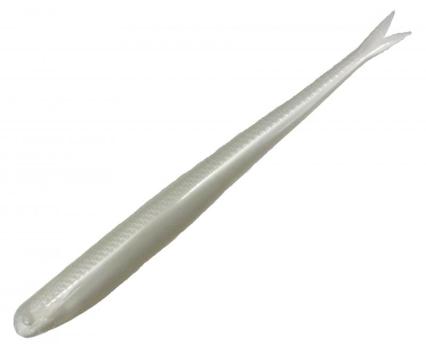
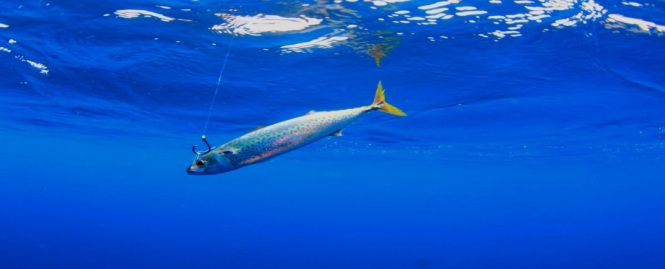
If you decide to go all-out for glory and tackle the pelagics, you have a few options to consider. For the kings, you can opt to go with livebait, dead bait, lures or soft plastics. In terms of bait, squid is the go, preferably as a livie but as a fresh deadbait it is also a good option. If the kings are really on they can even take californian squid too. In terms of lures and plastics you are looking at sinking stickbaits and big 10 inch soft plastics with white being the colour of choice for most anglers.
For the tuna, if you are in a quick boat a small skirt might be an option, Kieran managed to nab a tuna the day before the comp last year using this method. Hard bodies seem to be a better option in the winter tuna season out behind Lawrence Rocks rather than summer on North Shore. From last year’s reports plastics are a better bet here, look for 7″ jerk shads with pilchard/blue flecks. There is always the livebait option too if you can find some slimies! As the comp draws closer I’m sure the boys at Portland Bait & Tackle will be able to give you the low-down on what is working out on the reefs.
Clothing
During warmer weather, the more you can cover up, the less sunscreen you have to apply! You should also consider moisture-wicking and drying-times when kayak fishing and as a result do not use any cotton clothing or rash vests as they dry slowly and are cold when wet. Wet suits are great in the water, but out of it they act like a Coolgardie fridge with the wind carrying away your body heat in much the same way as an evaporative cooler does in your home.
Head wear:
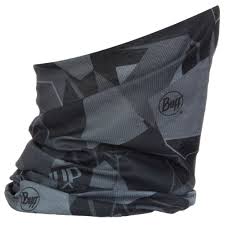
There are a couple of options for head wear during summer. You can either go with a hat & buff combo or an all in one flap hat. Buff offer a wide range of face scarves that fit the bill, and an official Buff® buff can be purchased from Technical Headwear. If you go down the road of an all in one unit, you can get the Adapta-cap from Sun Protection Clothing Australia.
Upper Body:
Up top long sleeves help cover the skin to protect from the elements. This can be in the form of a light thermal such as the 2P Thermo from Adrenalin or a lightweight UPF50 polo. Again it is a case of avoiding the cotton t-shirts and lycra materials! If a nice lightweight polo is what you are after, for this year’s comp we’ve teamed up with Sun Protection Clothing Australia to produce a UPF 50 branded fishing shirt with all of the sponsor logos from #NSC18 with a sleek Southern Bluefin Tuna on the back. Profits go to Portland Surf Lifesaving, so you’ll be helping to save your skin as well as beach goers down the coast! You can add one to your entry at checkout when you register for the comp or click here if you want to add one later. On colder days you can layer up with a spray top or cag jacket from Lovig’s or Kokotat.
Lower Body:
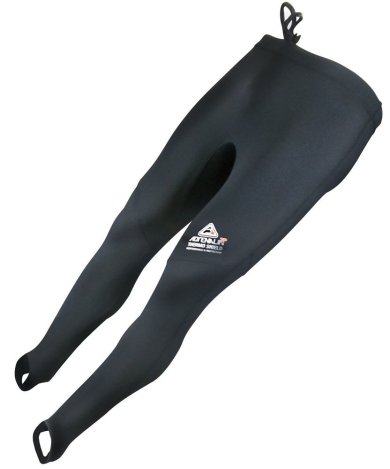
On sit-on-top kayaks and skis we don’t have the luxury of leg protection from the deck of our boats so again coverage is key. A pair of lightweight UPF paddling pants or cargo pants can do the trick on warmer days such as those available from SPCA or if there is a breeze about a pair of light thermal pants can do the job nicely again the Adrenalin 2P thermos fit the bill.
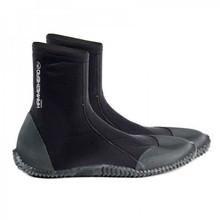
Due to sharps on the beach as well as landing on slippery rocks and reefs, some protection for your feet is very important and often overlooked. So pop a pair of old runners on or pick up a pair of dive boots and you are ready to go!
If you are having trouble finding some of the gear or need to borrow a spare, feel free to add a post on the NSC Facebook page. You can also hit up some of the other guys for advice on the page or try to glean some more useful info after the briefing.
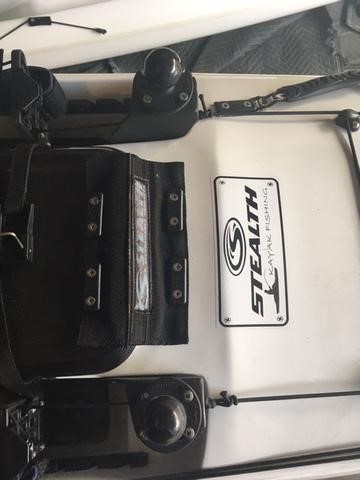
Your Stealth ski is a pretty sorted fishing platform right out of the crate, but we all fish in different ways, different locations and the tackle rat is stronger in some than others!
We’ve teamed up with some local manufacturers to design and produce a few pieces of kit that will help turn your ski from a weapon to a WMD in no time. Most people don’t have the luxury of keeping two or three kayaks to cover all of the types of fishing they want to do, so ultimately their kayak has to serve a few purposes. We’ve come up with a few products for those that need to use their skis across a few different fishing environments.
If you want to run a 5″ sounder or find that your GPS combo is chewing up your battery juice, we have you covered! Upgrade your standard battery box to one of these units and have the option of running a 4ah, 7ah or 9ah battery, while still keeping it tucked into the fish hatch wall and out of the way. You can also slot in a lifpo4 battery and up your a
These battery boxes install into the fish hatch wall directly under the seat on your ski allowing you to tuck tackle boxes, gaffs, or even your catch under your seat without snagging up on the battery or cables. These oversize boxes are also secured in place with a backing plate to prevent damage to the wall of your fish hatch and also feature a handy cable clamp on the reverse to help protect your cables from pulling in the event of a nasty roll in the breakers.
Features:
Lightweight thermo-formed ABS construction.
Custom backing plate with locating tabs for easy install.
A well set-up anchor trolley is a handy piece of kit allowing you to safely and easily set and retrieve anchors especially in high flow areas. A good anchor trolley has multiple uses and can be used to connect any of the following to your ski:
Anchor
Drogue
Live bait tube
Stake-out pole
With this in mind, we have designed an aftermarket anchor trolley kit that can be installed on all Stealth fishing skis that have the standard cloth handles. It utilises existing mounting points avoiding the need to drill holes in your ski. There are two versions of the kit depending on whether your front handle runs horizontally across the ski or vertically along the nose. Please select the kit to match your ski handle type.
A step by step installation video is available on our website if required.
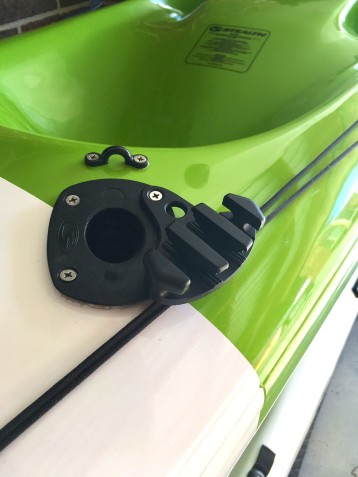
Anchor Cleat
We have also designed a bracket for a zig-zag cleat that attaches to one the rod holders on your ski without the need to drill any new holes. The cleat attaches to the bracket using pre-drilled and tapped holes with no protrusion behind the bracket. Once fitted these cleats can be used for cleating off your anchor, cleating your anchor trolley line or for attaching a burley bucket or live bait tube as required.
The Kit includes:
nylon zig-zag cleat
aluminium mounting bracket
2 x 316 grade cleat attachment bolts
2 x 316 grade extra long self tapper screws
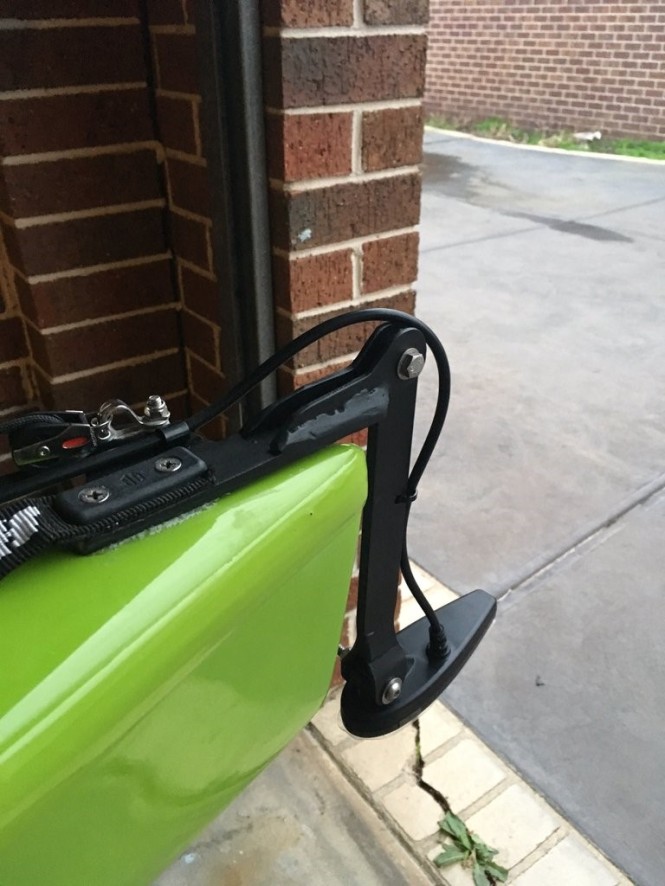
External Transducer Mount
We have created a new external transducer mount for the Stealth range of fishing skis to address a number of issues we hear from customers;
Total-scan transducers can’t shoot thru-hull.
Inaccurate water temperatures.
Poor image due to air gaps under the transducer.
Hassles removing epoxy or marine adhesive mounted transducers when upgrading sounders or selling your ski.
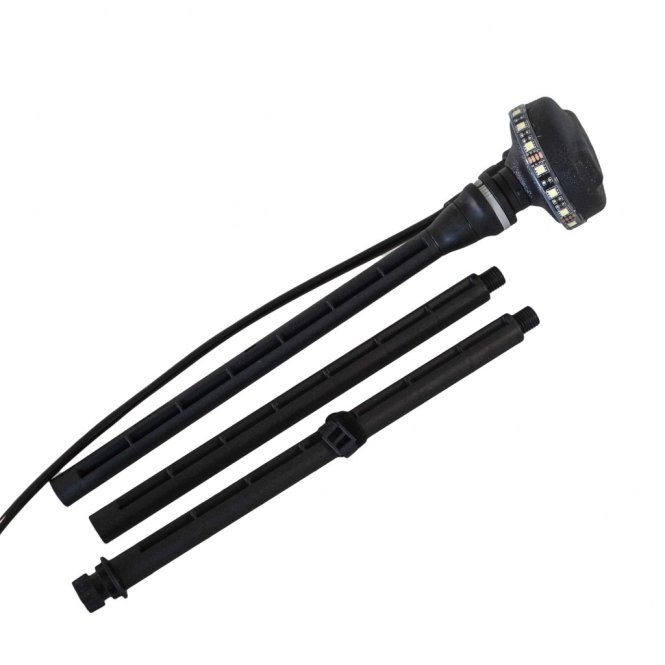
We have created a series of droppers compatible with Garmin, Lowrance and Humminbird transducers. These attach to a deck mounted pivot allowing you to fold up the transducer on the rear deck for transport or for sessions playing in the surf.
There are two types of pivot available; the standard unit or the combo which incorporates a rear bracket for our anchor trolley system. The pivots have the same hole spacing as a toestrap plate allowing it to be mounted under the rear handle without the need to drill any holes.
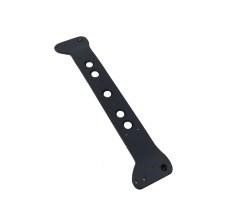
Epirb Bracket
For those venturing offshore down here in Vic as well as some of the other states, carrying an EPIRB (Emergency Position Indicating Radio Beacon) is a mandatory requirement when fishing more than 2 nautical miles (3.7 km) offshore. These need to be easily accessible to be useful as the last thing you will want to do when things get hairy on the water is to open a hatch to go and look for it. With this in mind, we’ve developed these handy attachment plates to fit your EPIRB on the rear deck of your Stealth, within reach but still out of the way for a day’s fishing.
Constructed from lightweight aluminium and pre-drilled for the fitment of both GME and KTI branded EPIRB models, these attachment brackets can be installed at the front of the cargo recess on the rear deck using the existing mounting points for the two shock cord keepers. It is simply a matter of un-doing the shock cord clamp, inserting the bracket underneath and re- attaching the clamps using the extra long self tapping screws provided.
Sea Sherpa are now producing some universal front rod holder brackets for Stealth skis. These brackets can be fitted to your ski on the side wall of the fish hatch without impeding the forward and backward operation of your foot pedals.
The brackets are made as a universal fit so the same bracket can be used on any of the models. We have even made a universal hole pattern on the top plate of the bracket with holes pre-drilled for RAM round bases, RAM rectangular bases and round Railblaza starports. This allows you to to fit the range of ram rod mounts or Railblaza fittings up front for bait fishing on the bays when it is too rough out the front to chase pelagics.
A front rod holder can be pretty handy when chasing pelagics too, giving you somewhere close to hand to stash your rod when you go for the gaff shot, or simply a handy spot for your sabiki rod.
On my skis, I use these brackets to mount Berkley Quicksets on RAM extenders. This setup allows me to run two bait rods easily directing both lines away from each other while maintaining the ability to open the fish hatch when required. The use of Quicksets also means I can insert and remove my rods by holding just the end of the butt, allowing me to mount rod holders further forward out of my paddle stroke.
The other handy feature is that rod holders can be easily removed and stored in the fish hatch leaving only the bracket and mount behind. This leaves a nice clear deck for surf zones or for transport.
For more information, or to blow your tax return and get your hands on any of the gear, hit up our website.


 The Icom M series radios are generally considered to be one of the best units around, they are very popular with the offshore yakkers up north. Personally I love my Uniden MH, it hasn’t missed a beat. You can also buy a waterproof sleeve for your radio too which will help protect it in the surf.